Table of Contents
Getting fitted for equipment isn’t a “one-size-fits-all” approach for most golfers. Being properly fitted is like getting formal attire sized. Factors like your height, weight, posture, and body type can greatly affect how the suit fits. Imagine showing up to a red carpet event with baggy, unfit clothes. The same applies to how to build golf clubs.
Let’s face it, golf is not the cheapest sport to play. However, if you’re going to play it…do it right. Even if playing golf for enjoyment is your primary goal, you’re going to want equipment that delivers consistent results.
In this article, I’m going to teach you golf club building techniques that tour pros receive. As a bonus, I’ll share how to build golf clubs so you can save some money for green fees, balls, and the “19th Hole.”
DIY 101: How to Build Golf Clubs
So, let’s start by watching my video on how to build golf clubs, but don’t skip some of the key details in the article below.
Now I am going to give you a play-by-play on how to build golf clubs from the comfort of your home.
How to Install a Golf Shaft & Grip: Steps 1 – 22
- Determine the diameter of the hosel of your iron.
- Specify whether your iron is parallel or taper tip. You should be able to do a quick Google search on your product to confirm.
- Dry fit your shaft and club head to ensure proper size.
- Insert the Golf Club Head Spiral Brush with an electric drill to ensure there are no loose particles.
- Take a tee and place the pointed end inside the hosel so you can measure the depth of it.
- Mark the depth on the tee with a permanent marker.
- After following the manufacturer’s trimming chart (Google search), cut the shafts on the tip end.
- Use the tee to mark the tips of the cut shafts so you can abrade the tips for installation.
- Place the tape just above the total depth marking.
- Using sandpaper, abrade the tip end of the shaft that goes inside the hosel. Note: Graphite shafts may seem large in diameter, but the paint needs to be carefully sanded down.
- Mix the two-part epoxy (one club at a time) with a stick on a piece of cardboard.
- Quickly, abrade the inside of the ferrule with the spiral brush and slide it on the shaft.
- Take the mixing stick and dip it in the compound.
- Allow the compound to fall into the hosel of the iron head.
- Roll it around to ensure the entire inside of the hosel is coated.
- Lightly coat the tip end of the shaft with the mixed compound.
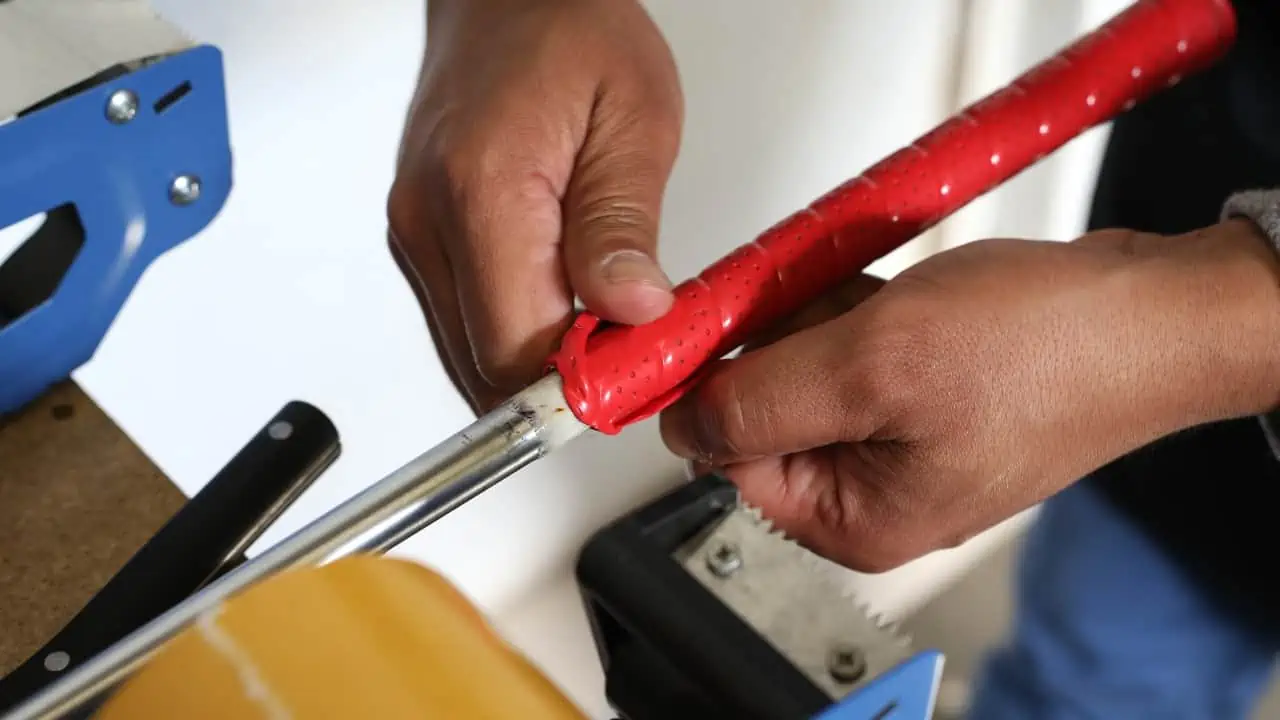
- Insert the shaft into the hosel and push the ferrule down to the metal.
- Clean any excess compound off with a paper towel.
- Place the Head-to-Shaft Drying Clip on the hosel and shaft.
- Make sure the heads of the clubs are touching the ground. If placed upside down the epoxy could run down the shaft and harden. This will cause the shaft to sound like a rain stick.
- Wait 24 hours for it to cure.
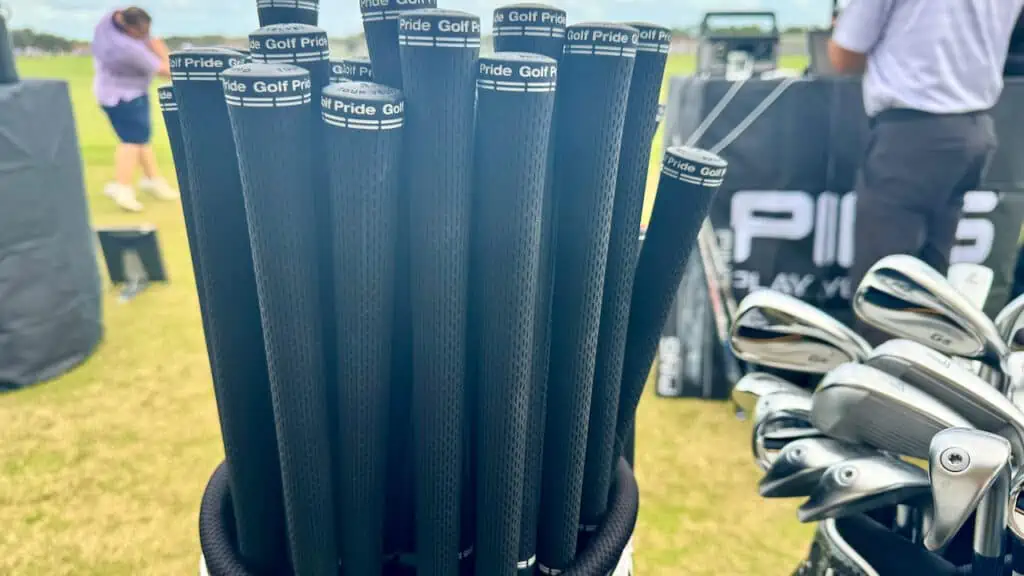
- Install the grip (watch our video for regripping a golf club instructions).
Golf Club Making Supplies for Shaft Installation

- Golf Club Head Spiral Brush
- Two-Part, Long Cure Epoxy
- Manual Pipe Tubing Cutter (steel shaft only)
- Mini Hacksaw (graphite shaft only)
- Mixing Stick (I use a long tee)
- Head-to-Shaft Drying Clip (not required)
- Digital Scale
- Lead Tape or Tip Weights
- Golf Club Length Ruler (not necessary unless you don’t know the total shaft length)
- Sandpaper
- Ferrule Kit
- Lint Free Paper Towels
- Re-Grip Kit
Record all your numbers on this golf club specification form below:
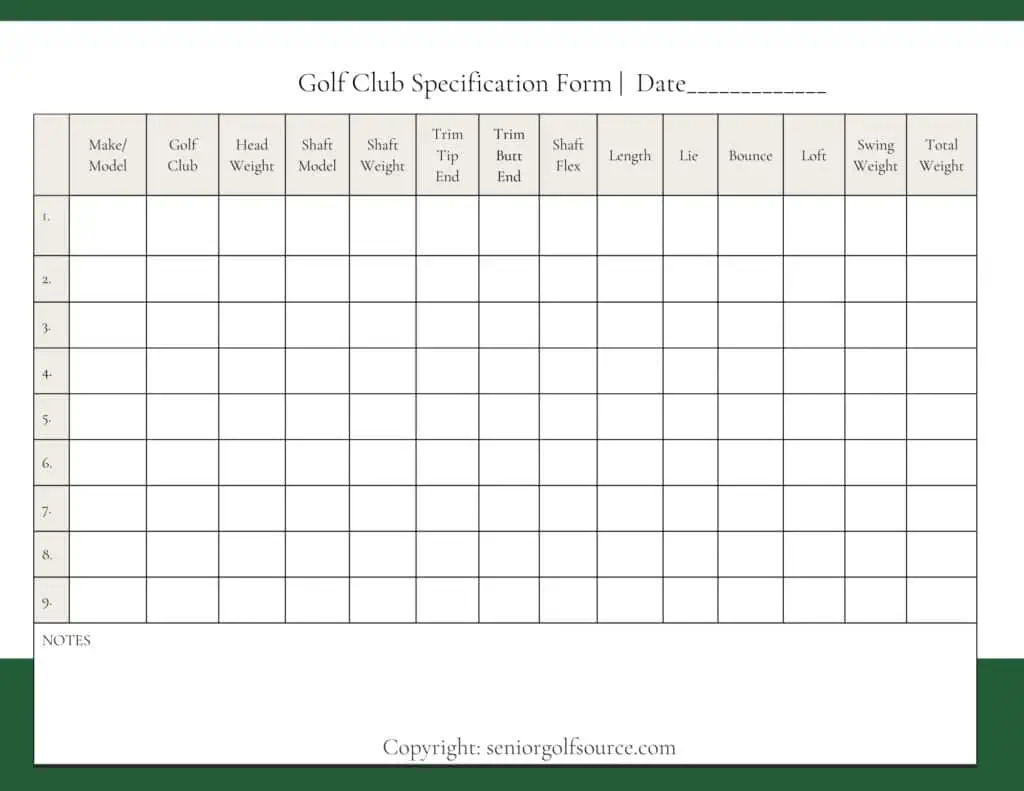
Download a FREE PDF of the Golf Club Specification Form here:
Custom Golf Club Making: Language for Builders
Since my goal is to educate you on the effects of club build and design, let’s go over a few terms and definitions that you should be familiar with:
- Shaft Length – your height and wrist-to-floor measurement typically determine the length of your iron shafts.
- Shaft Flex – measured in CPMs (Cycles Per Minute). There are set frequency ranges that determine the firmness of the shaft.
- Kick Point – located in three different regions (high, mid & low) of the shaft; this is what helps produce different types of trajectories.
- Torque – a measurement of how the shaft can twist throughout the swing.
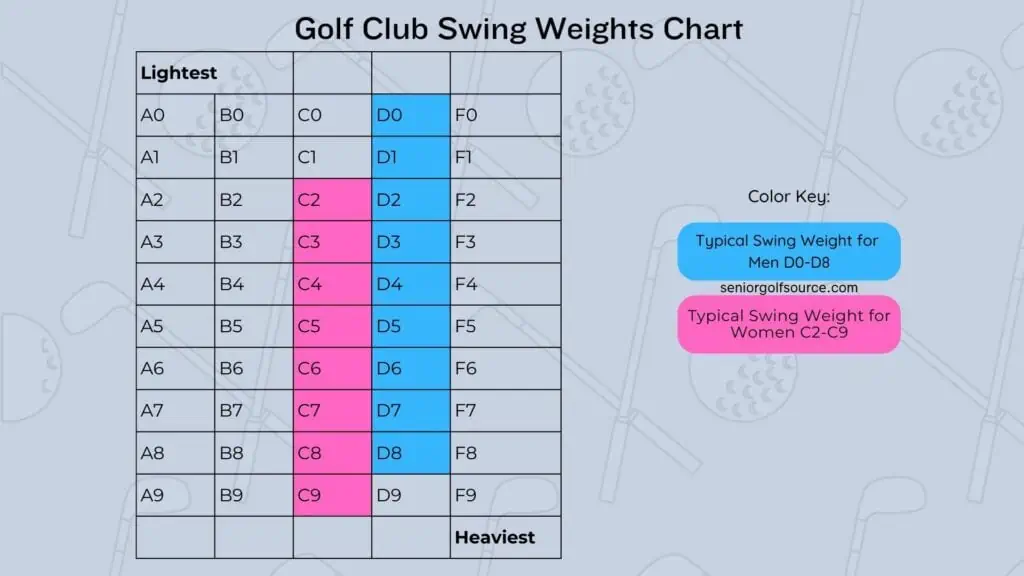
- Swing Weight – this is how the club feels while swinging. The heavier the club head feels, the higher the swing weight. Likewise, the lighter the club head feels, the lower the swing weight.
- MOI – Moment of Inertia is a measurement of how much the club face resists twisting. The higher the MOI the better.
Golf Iron Specifications Defined
There are several factors to consider when selecting the correct head. The design, look, and cost will play a major role in your final choice.
Here are some key terms to consider studying:
- Sole Relief – Some irons are designed to shape the ball while others are designed to hit it straight and clean off the surface.
- Face Size – Some club faces are larger than others. If you are a high handicapper, then you should maximize the hitting area.
- Grooves – The depth of the grooves will affect your spin. For example, a deeper groove will increase while a shallow groove will decrease spin.
- MOI – Moment of Inertia, typically the larger heads have a lower MOI which produces higher launching shots.
- Perimeter Weighting – This produces forgiveness on off-centered shots.
- Offset – More offset helps reduce slice by bending the hosel in front of the face.
- Topline – This is the view we have looking down on the club head. Better players tend to gravitate towards thin top lines.
- Lie Angle – This angle affects your immediate direction. For example, if your golf club is too upright (for a right-handed player) then the ball will be pulled left of the target.
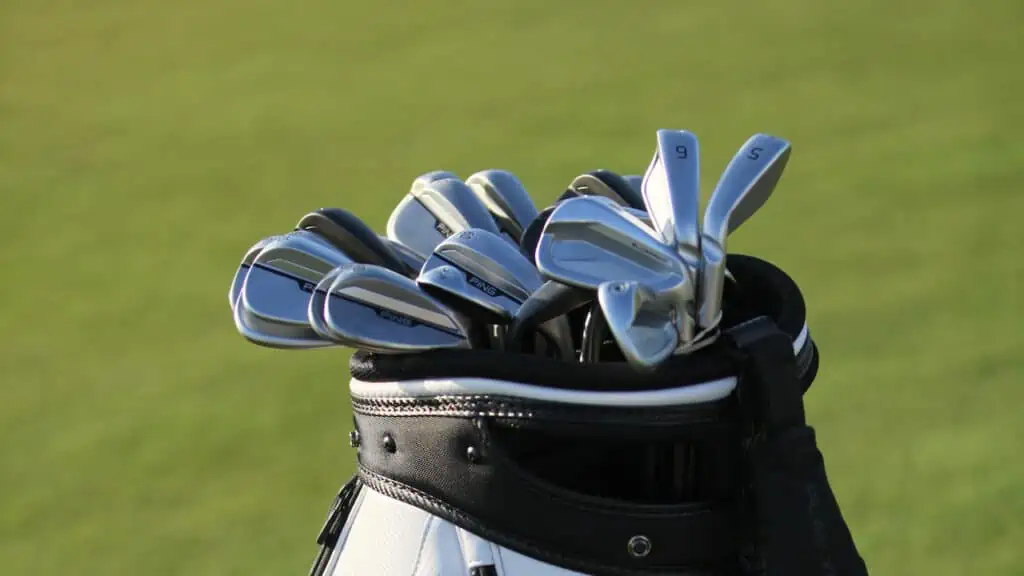
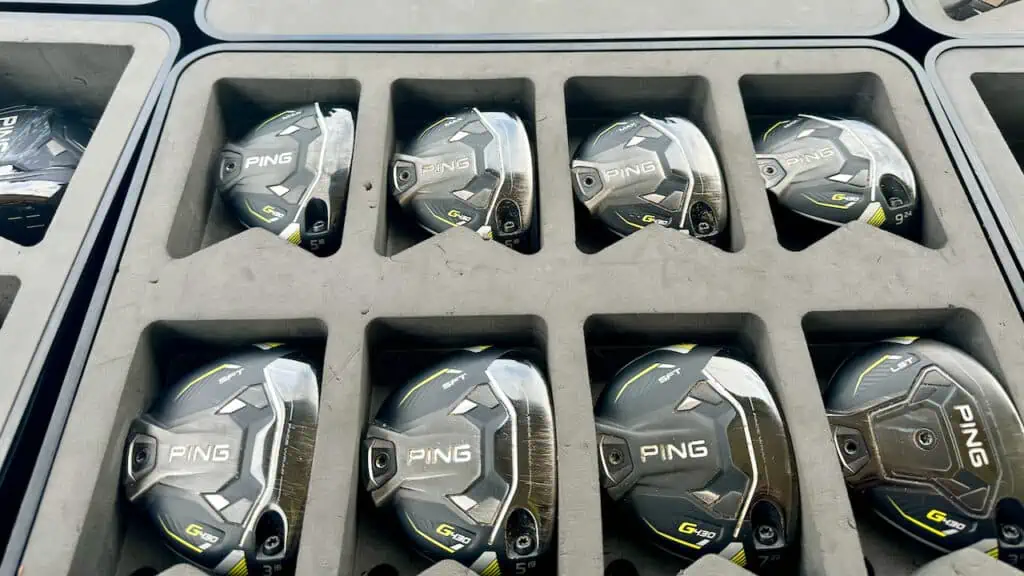
Irons typically come in 3 variations of sizes:
- The Blade – less forgiving and designed for low, single-digit handicaps.
- The Cavity Back – most common design for most golfers and is designed for high, single-digit to 15 handicaps.
- The Game Improvement Hybrid – large and forgiving, the design blends the technology of fairway woods to help high handicap golfers launch the ball.
Custom Fitting: Selecting the Right Club Head
Selecting the proper club head is one of the most important factors. Most major manufacturers offer 3 different styles of iron club heads. The selections typically consist of a blade, cavity back or game-improvement head.
Your level of skill directly affects which style of club head is best for your golf game. For example, if you’re a 6 handicap or better a blade iron head would be recommended. If you have a high, single-digit to 15 handicaps, then a cavity back iron will likely be suitable. If you’re a 16+ handicap, then you might need a forgiving game-improvement head.
When it comes to the assembly of a club head, the total weight can greatly impact how the club feels during your swing.
If a player who struggles with swinging over the top elects to play a light swing weighted club, their problems are only going to increase. As a result, as the club head becomes too light then the player loses sense of where the club head is causing an increase in their typical error. This is where understanding numbers as you build helps you avoid imperfect swing weights.
If you’re still undecided on which manufacturer to play, check out our article, on the best Irons for seniors.
Golf Club Swing Weights Chart
Over the years, I have helped dozens of senior golfers just by introducing a more forgiving head. For example, a close friend of mine (10 handicap) played blades and was known as a low-ball hitter.
I suggested that he play a blended set of irons to help with increasing his spin and launch angles. We switched out his low lofted blades (3-5 irons) and replaced them with cavity backs. As a result, he no longer struggled with distance control on his long approaches.
Now that we understand the three different types of club heads, it’s time to discuss shafts. I wrote an article my top choices for iron shafts to help you narrow down what shafts will work best for you.
3 Helpful Tips for Reshafting/Building Irons
- Once your club is assembled, visit a local golf shop like Dick’s Sporting Goods and see if they can measure your swing weight. Record this on the specifications sheet.
- Lead tape is a great option if you need to increase the swing weight. Every 2 grams of lead tape will change the swing weight by 1 point.
- Follow the chart for swing weight provided in this article. D0-2 is the unspoken standard for most men’s golf clubs, while C2-4 is for ladies golf clubs.
Final Thoughts
In conclusion, golf club building can get very technical, but there are options for the novice builder to create a balanced set of clubs or deal with a simple golf club repair.
Since most clubs from major golf manufacturers are built in mass quantity, you might encounter some quality control issues. If you find the task of club building too daunting, have no shame in visiting your local builder to resolve any golf equipment issues.
Next, check out our article on our favorite golf shafts on the market.